Chapter 7
Build a Custom Report
Chapter 6 of the User Guide explained how to the build standard reports, this chapter describes how to create custom reports.
Recall that the Report menu allows users to change the data displayed in the Report and to select the geography at which the data is presented.

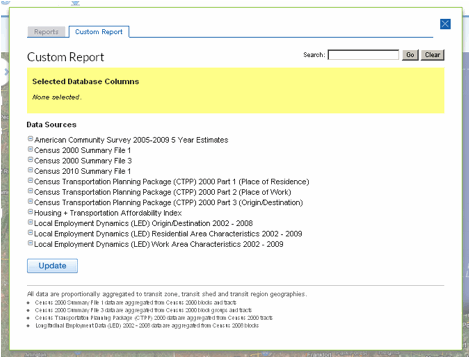
The Data button, which can also be accessed from the selected station dialogue box, allows the user to choose the data to appear in the report. The dialogue box opens to the Reports tab which lists the standard reports that can be viewed. Click on the Custom Report tab to begin building a custom report.

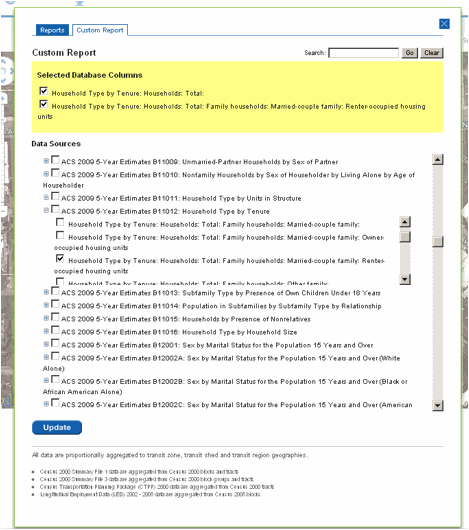
Click on the plus sign to the left of the data source names to view the columns within the data sources that can be selected for inclusion in the custom report. Columns that have been selected will appear in the yellow box at the top of the window.

Data from multiple different sources can be selected at once. Chapter 5 of the User Guide gives an overview of the data sets included in the database. When the desired columns have been chosen, press the Update button to close the window and return to the updated report. If the source of information is unknown, the Search function can be employed to pull up all the columns within the data sets that contain a specified word or phrase. To search through the data sets simply enter the word in the search bar and click the Go button.
Click on the Clear button to remove the information provided by the search. At this point another search can be run or columns can be selected manually. Pressing the Clear button will not remove any selected columns.
To close the report window press the Update button or click the X in the upper right-hand corner of the window. Clicking the X will also update the report with any changes that have been made.
